Google Earth Engine: Easier Way to Download Satellite Images
In my previous post, I talked about downloading satellite images from USGS Earth Explorer. However, downloading satellite images through Google Earth Engine is much more convenient. In this post, I will introduce an easy workflow to clip and download satellite images to the desired boundaries through Google Earth Engine.
Step 0: register with Google Earth Engine to obtain a valid account.
Step 1: explore the available datasets by visiting this website.
For example, if I want to download the Land Cover image for north of Miami, and I find the GlobCover dataset through the catalog, I will first go to the introduction page of the dataset: click here.
On the page, click on “OPEN IN CODE EDITOR” button. Then, we are on the code editor page. A brief introduction of the editor can be found here.
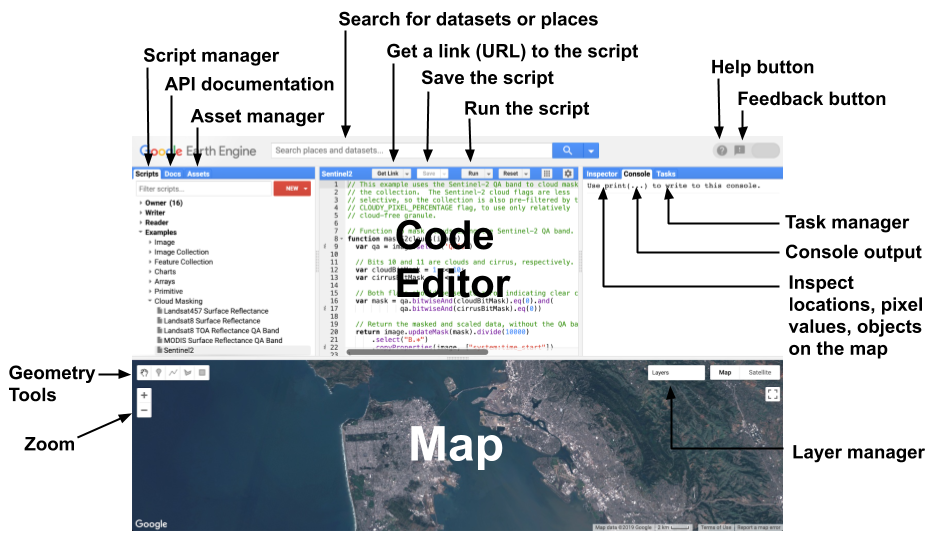
Figure above from Google: Diagram of components of the Earth Engine Code Editor at code.earthengine.google.com
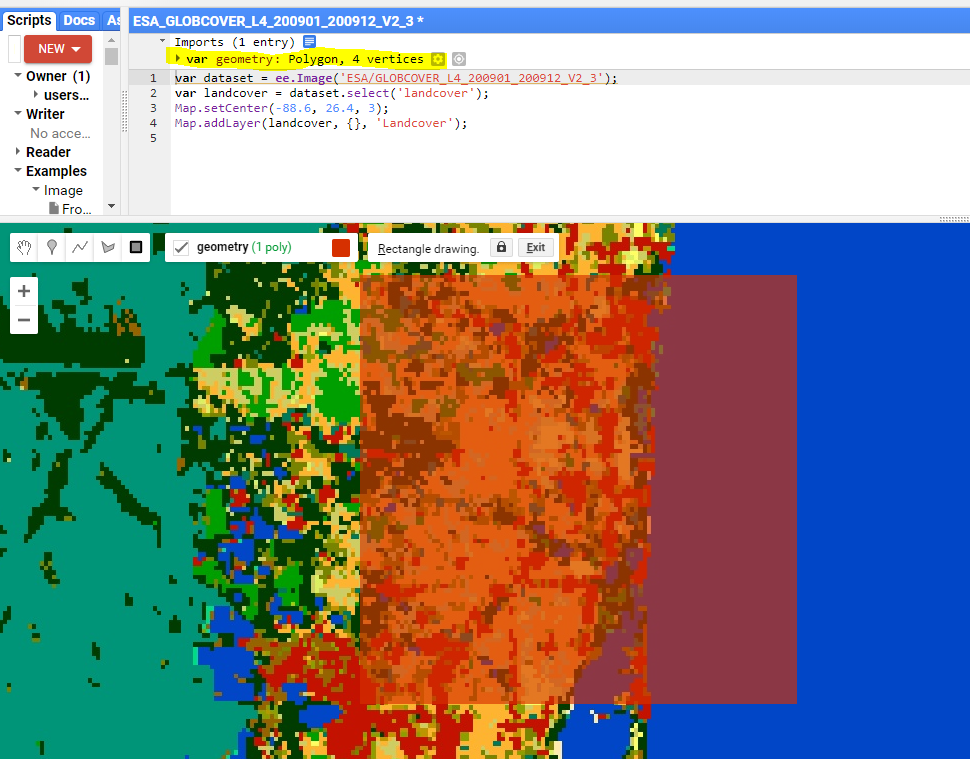
Step 2: Click Run on the Editor. This will load the land cover layer on the map. The default extent in the world. Zoom to the site we are interested in. For me, I zoomed to Florida area.
var dataset = ee.Image('ESA/GLOBCOVER_L4_200901_200912_V2_3');
var landcover = dataset.select('landcover');
Map.setCenter(-88.6, 26.4, 3);
Map.addLayer(landcover, {}, 'Landcover');
Step 3: Click on the “Box” button in the Geometry Tools, and manually draw a box on the map. Here, Editor will automatically generate a variable called “geometry”, which represents the box I just drew. (If you want to upload a shapefile to use as the clipping boundary, please read this article here. )
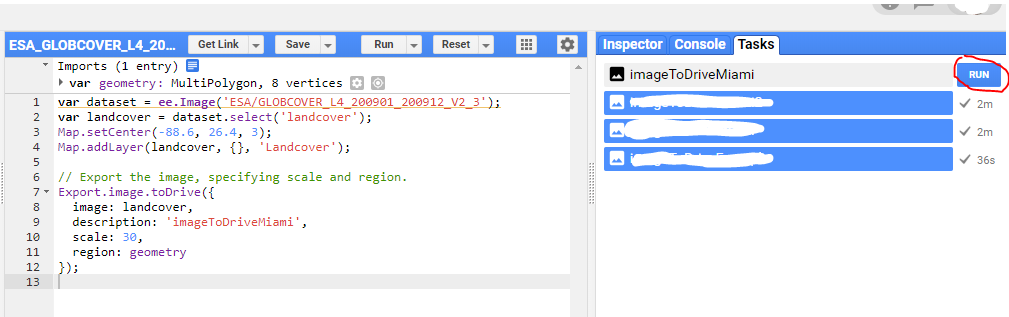
Step 4: Download the image. After reading the exporting options page, I modified the exporting code to:
// Export the image, specifying scale and region.
Export.image.toDrive({
  image: landcover,
  description: 'imageToDriveMiami',
  scale: 30,
  region: geometry
});
(Make sure to change the image to the variable name of the satellite image.)
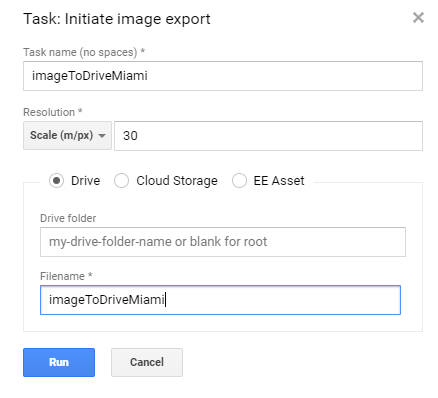
Click run. Then, I can find that the “Tasks” tab turns orange. Go to “Tasks” tab, and click “RUN” on the task I just created.
After clicking on Run, this pop-up window allows me to modify the resolution/folder/file name of the export. Click on Run this page.
The export took about 2 minutes for this task. After 2 minutes, the image appeared in my Google Drive.
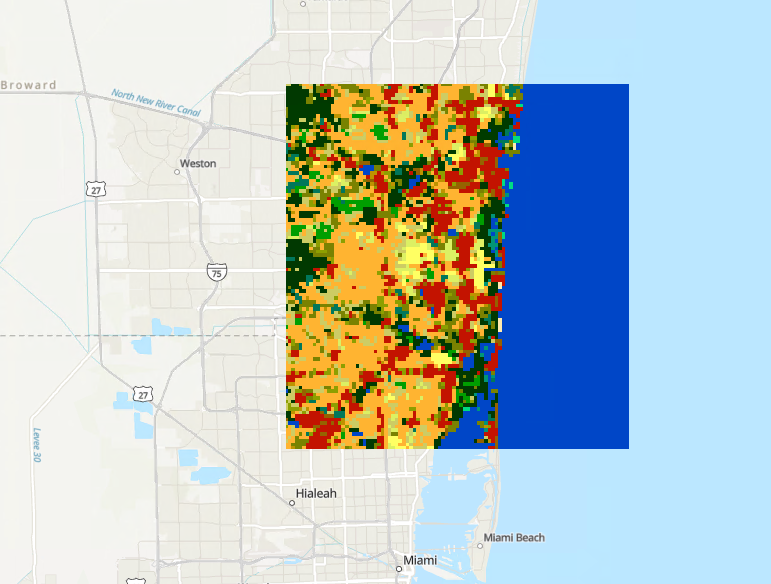
Step 5: Use the image. The exported image’s format is geo-referrenced TIFF. By downloading the image and loading it into GIS software, I can see the raster image showing up in Florida. From here, I can use this image as basemap, raster analysis element, etc. Image below shows the downloaded TIFF added to ArcGIS.